|
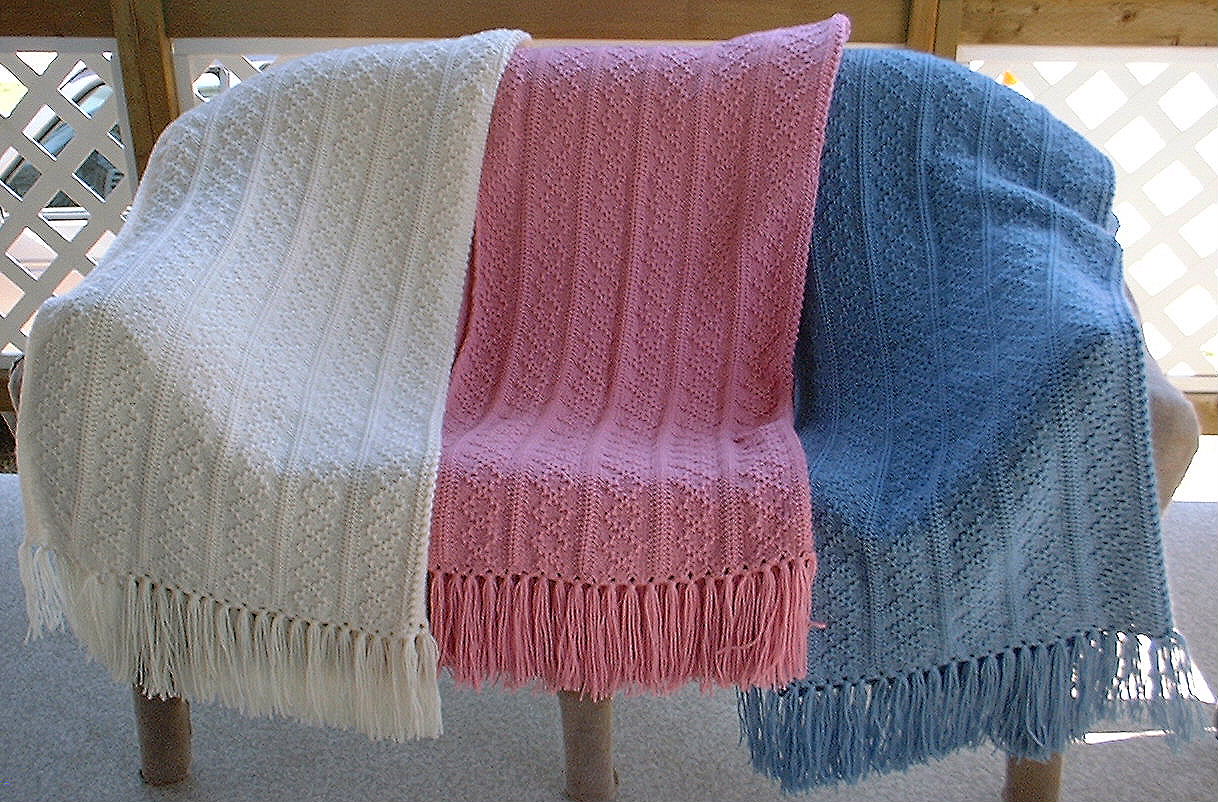
| Aran style Afghans |
|
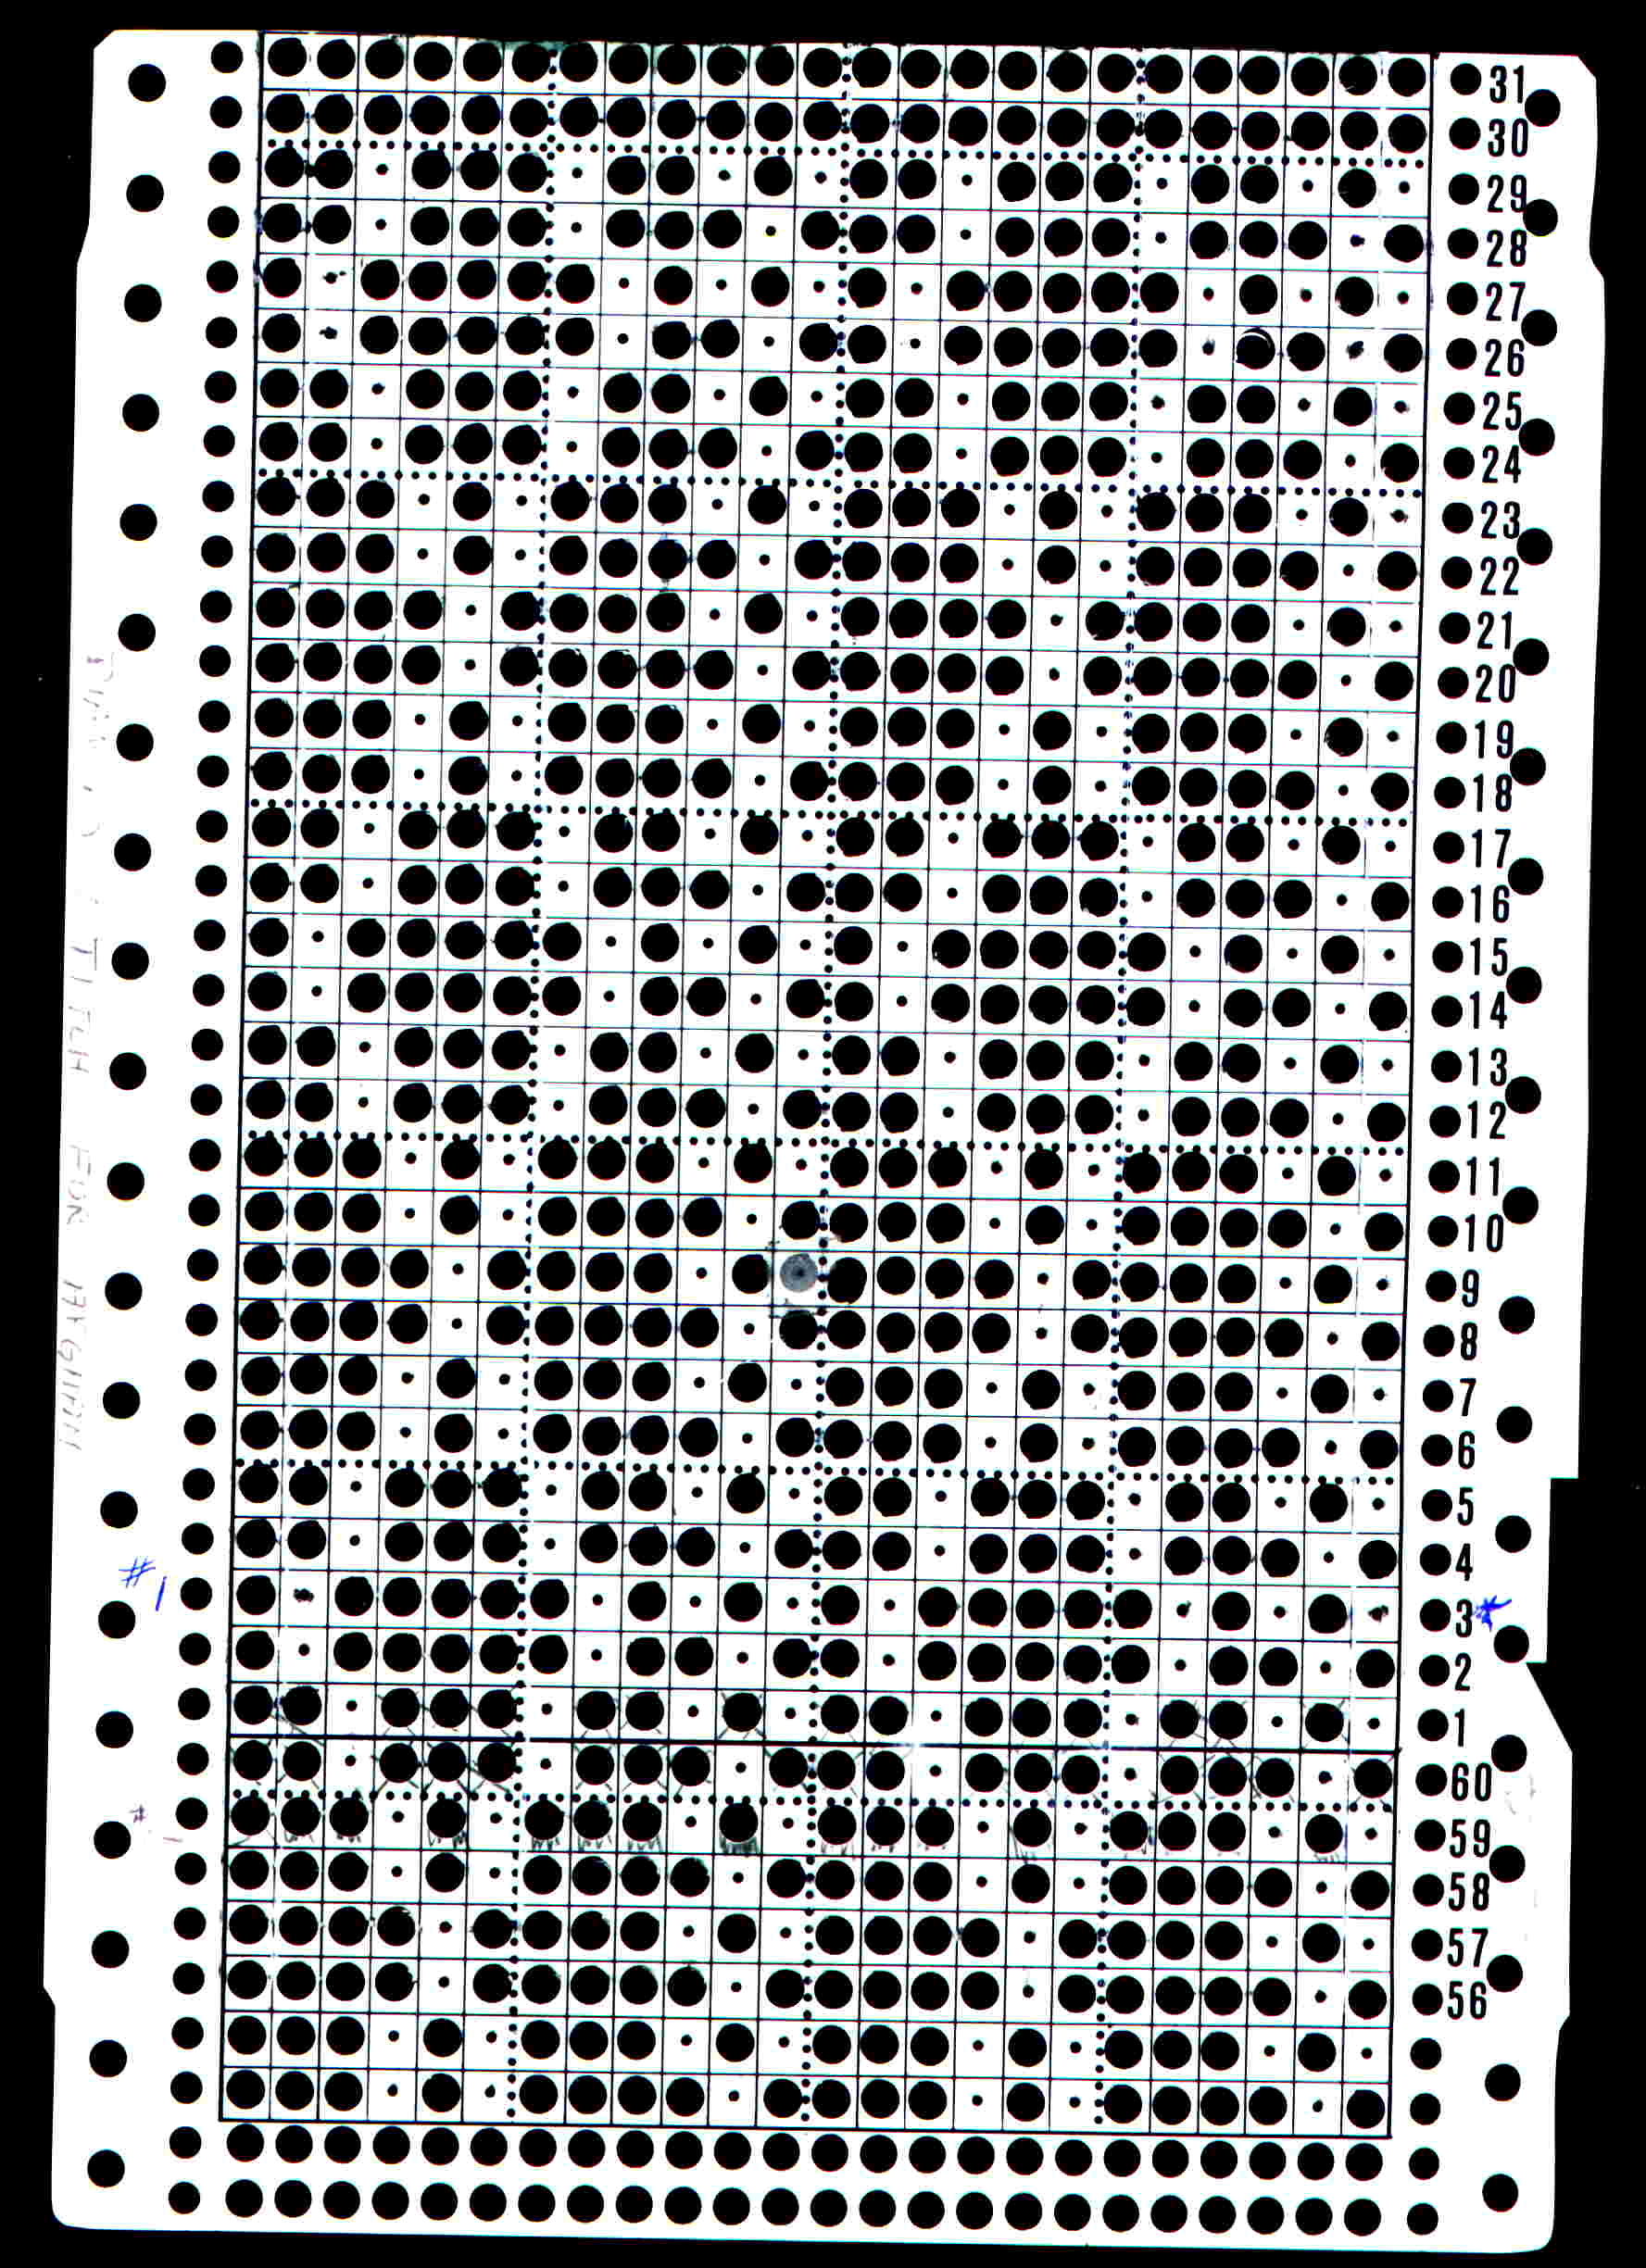
| 24 stitch puchcard |
|
Click here to see a larger view of this punchcard.
Please note: this afghan pattern is posted for your use, and you can change it to suit yourself.
These instructions are the way I have done it, for the above pictured afghans. This Afghan is done on a Bulky knitting machine with
tuck capabilities. You may use a punchcard machine or an electronic. All the pictured afghans have been done on a Brother
KH260 but you may also punch a 12 stitch punchcard for the Studio 155 machine as well. Just use the first 12 stitches on
the punchcard, as you will see that it is just a 12 stitch repeat. Programming it into an electronic will require you to
program in one repeat, which is 12 stitches wide by 12 rows high. You may also use this same pattern on a standard gauge
machine, but your afghan will be smaller, more the size of a baby blanket.
This punchcard is punched for Studio machines. To use it properly on a Brother
machine, the starting line is line "3".
This is a Tuck Stitch Pattern. There is one spot on the punchcard that seems
to show poorly....It is Row #9, Stitch #12...I used correction tape to fill in the hole, it should not be punchced out, but
it shows as punched....do Not punch this hole!
There has been so much confusion about this card it is unbelievable. Your choice, do you want the pattern to start at the
beginning of a diamond? Then start the card at #3 if you are using a Brother machine. If you don't care then start it wherever
you wish, but do the same for each panel, just be consistent. Also, take a good look at the card designed for the charity
afghan, it is the same diamonds with an EON 1X1 tuck through so it can be used at the beginning and ends of the panels making
the need for fringing unnecessary. You are the designer. If this isn't clear, do a swatch, and soon you can see what I'm
talking about. Every project should always have a swatch done first anyway.
Check your manual for the method of programming your punchcard, and engaging it to knit. Also, check your manual for the
correct method of knitting tuck. You will find the manual tells you to install your tuck brushes into the carriage as well
as bringing the rubber tuck wheels into working position on the bottom of the presser plate.
Also, and this is very important!!!!!...Make sure you have adequate and even weighting on your knitting. Tuck knitting requires
more weight than stockinette. Watch your weights and move up evenly as needed.
Needle setup: look at the positioning of the single motif markers on your needle tape (or make a sample swatch to determine
the needle selection). The punchcard gives 2 rows of diamonds with trellis-like separation. To provide the trellis on the
left hand side of the panel as well, you must add 3 needles to your setup. This makes a panel 2 rows of diamonds wide. Now,
for each extra row of diamonds, add 12 needles to the setup.
Crochet Cast(loosely) on on these needles, knit to left
and back to right and then create eyelets (every 3 needles works fine) and then knit 2 more rows, programming your punchcard
on the last row, then engage punchcard and knit to row desired (RC 514 or end of the diamond makes a nice length). Then knit
2 rows plain, make eyelets and knit 2 more rows and cast off loosely(do not cast off the beginning and end stitches--take
them off on safety pins).
Add fringe (I like about 5 strands cut 16 inches long for each fringe). I make 2 panels each
of 6 rows of diamonds.
Ravel the end stitch down 2 rows on panels placed side by side, pull 2 on one panel through the
2 on other panel and continue to the end, effectively joining the panels with a nice cable-like effect. Do edges of panels
the same way, but pulling 2 loops through 2 loops. Quick and easy and lays nicely after light steaming.
I find 2 one
pound balls of Red Heart Comfort(4 ply worsted weight) will make a nice sized afghan with fringe. Red Heart super saver yarn
can be used, but I find it heavier and not nearly as soft and cozy(and also requires more yarn). Watch your yarn and finish
the afghan leaving yourself enough yarn for fringe.(or you will find yourself buying a third ball)
2 minute wash in the
washing machine, spin and dry in dryer for 5 - 10 minutes. Then steam lightly as necessary. I prefer to wash, dry, and steam
before adding fringe, but that's a judgement call you can make. You might not even want to steam it at all.
*************************************************************
|
|
ARAN AFGHAN WITH TWISTED FRINGE
To use this fringe with the above afghan pattern, do not make the eyelets at the beginning and
end of the afghan panels.
Instead, just cast on with an e-wrap, knit one row from right to left, then with the punchcard locked, set the carriage
to KC and knit one row to the right to program your needles. If you are using the Electronic bulky machine, follow instructions
for your specific machine. Then unlock the punchcard, push in both tuck buttons and knit to row counter 508, then release
the tuck buttons, set the carriage to knit plain and knit two rows, cast off, leaving the end stitch open so you can ravel
it down. Plan your panels so you leave the opposite stitch open on each one so you don't have any end stitches unsecure when
you finish.
Now, you will latch the panels together just as the avbove afghan, then crochet a base of a row of single crochet and
attach fringe.
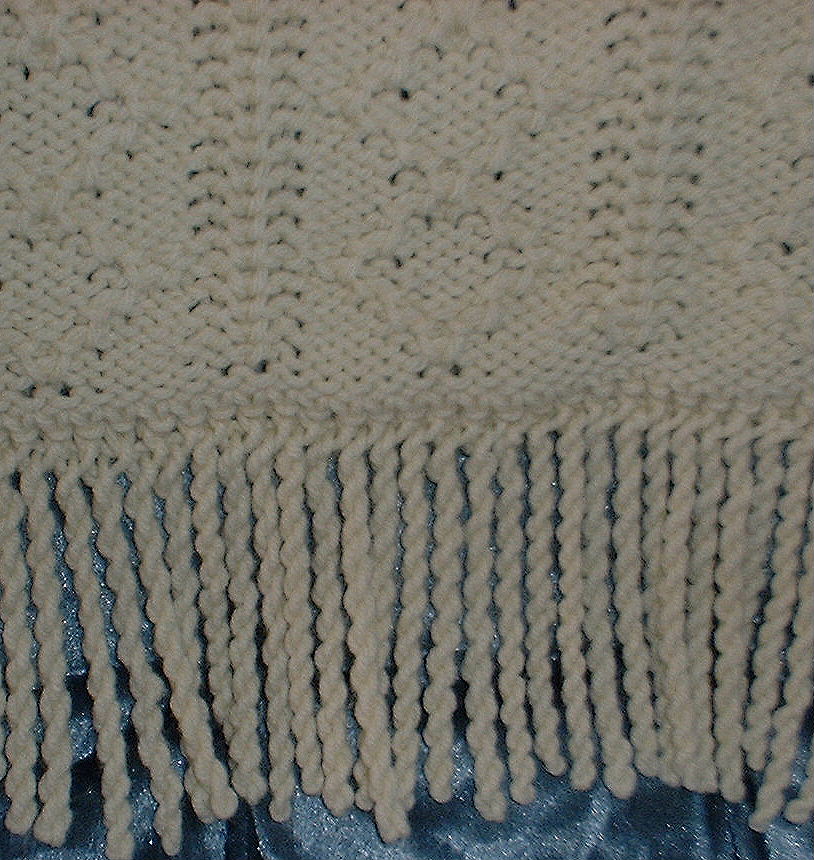
| Aran Afghan with Twisted Fringe |
|
This Fringe is durable and doesn't fray and look bedraggled after a few trips through the washer and dryer. It is made with
one continuous yarn, so it does not pull out or unravel.
It looks very similar to the fringe that Chenille Bedspreads have.
It is necessary to do a sample or some trial fringe first to decide on your length, and number of twists you wish to use.
After you have finished your item, be it an afghan or some other piece of knit (or crochet), crochet a base round of single
crochet.
1. Single crochet in the first single crochet of your base row. If you prefer a different stitch for a base row, or
multiple rows of crochet first, this is entirely your choice.
2. Now enlarge this loop you have on your hook by pulling this loop out further. You will need to experiment with this
to decide how long you want your fringe to be.
Try pulling it out to the length of 12 inches. You will want to try to keep this length the same for all the fringe to
have your fringe look even.
3. Now, keeping your crochet hook in the loop, twist the hook, thereby twisting the yarn loop. Keep track of the number
of twists you do, so that you can make the same number of twists on each fringe too. Try 26 twists for a loop 12 inches long.
This is something you must experiment with, since each yarn will be different. You want the full length of the loop twisted,
but not overdone.
4. Now, with the hook still in the end of the loop, slip stitch into the single crochet you just extended the loop on.
5. Single crochet in the next base single crochet.
6. Repeat steps 2 to 5.
7. The length of each fringe will be approximately 4 inches. You must straighten each fringe, and you can do it as you
go, or after you have completed your item. To do this, separate the twist, and pull the strands, and release and allow the
yarn to twist evenly back on itself. Sometimes, you'll need to do this a couple of times.
8. Finally, wash the item and then steam as necessary.
You'll be surprised how nicely this fringe hangs. The weight of the twists really makes the fringe hang well.
| How about a pillow made with the remaining yarn?? |

|
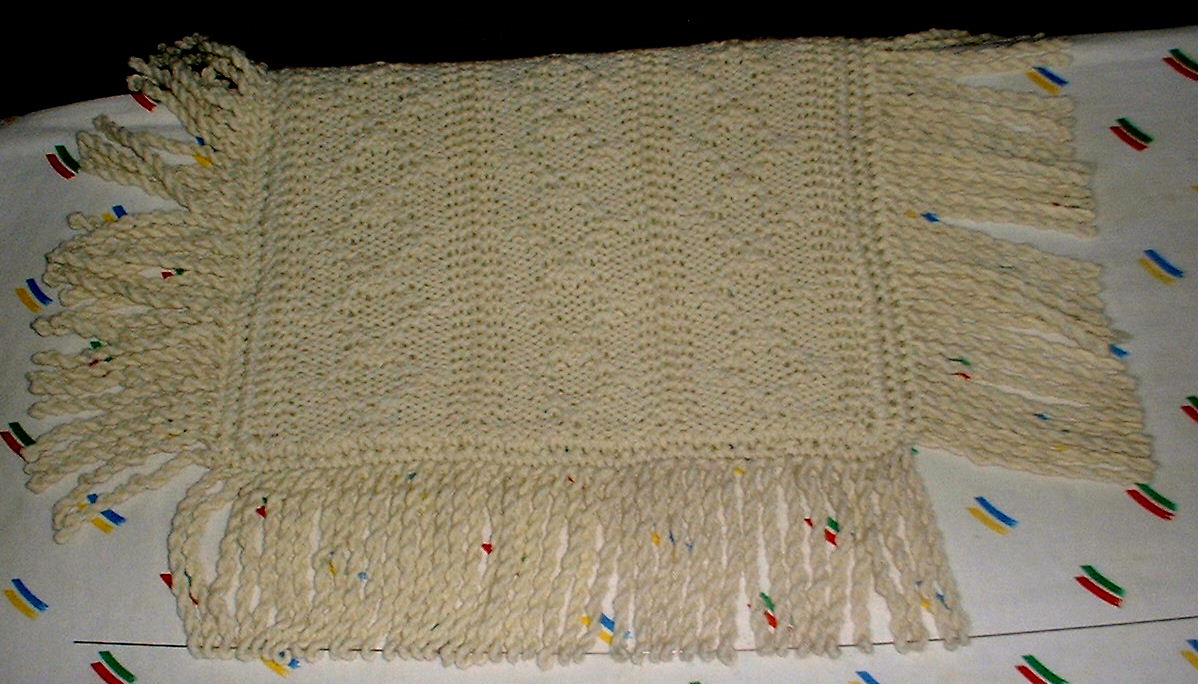
| To Block, or not to block.......... |
|
You be the judge, what do you think????
Left side shows fringe without blocking.
Bottom, shows fringe with blocking wires in place almost ready for blocking
Right side shows the finished fringe after blocking wire was held straight, and fringe was steamed to create fringe all
exactly the same length.
|
